
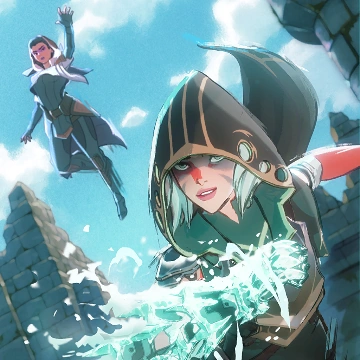
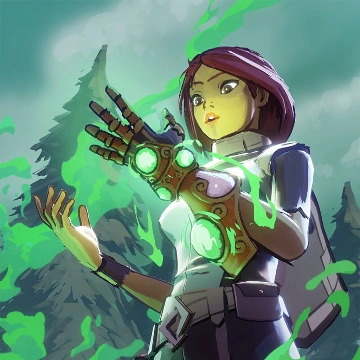
In Spellbreak you play as a Breaker, a battlemage tapping into the power of forbidden magic hidden within ancient Gauntlets of various elements.
Spellbreak's combat centers around 6 different elemental Classes, that enables you to master a certain element.
There are many synergies between the elements to discover, allowing you to combine and melt them together in unique ways.
Spellbreak is a multiplayer action-spellcasting game, drawing Gameplay aspects from the battle royale genre.
Basic Gameplay
Starting from nothing, players drop into the Hollow Lands to loot, increase in power, and defeat enemy players in order to become the ultimate battlemage.
Run, jump, levitate, dash, fly and teleport around your opponents in order to decimate them with powerful Spells & Sorceries obtained from Gauntlets.
Improve your talents as you pick up ![]() Scrolls and increase your stats through powerful equipment scattered throughout the Hollow Lands.
Scrolls and increase your stats through powerful equipment scattered throughout the Hollow Lands.
To further this end, visit Elemental Shrines to find a Rare Gauntlet corresponding to the shrine's element.
Players start the game with a baseline max health value of 100, a max armor value of 0, a max mana value of 50 and a Run Speed value of 21.5.[1]
As you part of your basic movement, following a jump you can levitate using your mana, allowing you to climb difficult to reach areas.
You will also find giant rifts in the ground caused by The Fracture, that will immediately exile any player unfortunate enough to fall in, ending the match for them.
Your goal is to escape from the Spellstorm and be the last one standing, either by either outlasting or exiling your opponents in combat.
The Spellstorm
As with most other battle royale games, one of the core game mechanics is an ever-shrinking safe zone that is marked by a circle on the map.
Players must aim to stay inside the safe zone at all costs in order to survive.
The safe zone will spawn 20 seconds after match start, and can appear anywhere on the Hollow Lands map.
Entering a new safe zone will level up the player, unlocking the next Skill for their chosen Class.
Outside the safe zone is a furious Spellstorm that deals 1 damage every 2 seconds directly to a player's health, bypassing armor.
The damage doubles in power each time the Storm fully encloses a new safe zone, and it will continue to shrink until the entire map is covered.
Additionally, ![]() Mana Vaults will spawn inside the safe zone each time the Storm fully encloses it.
Mana Vaults will spawn inside the safe zone each time the Storm fully encloses it.
Since week 7 of Chapter 1, Spellstorm Rifts began spawning inside the Spellstorm.
Following a short channel, these rifts teleport the player to a random location within the skies of the current safe zone, where they'll drop into the Hollow Lands anew.
Since week 11 of Chapter 1, Fracture Vents have manifested inside fractures, which launch the player high up into the air similar to Featherfall.
Since week 12 of Chapter 1, Aegis Towers have begun gathering power from the Storm. This power may be absorbed by Breakers to gain a powerful buff.
The Lobby
The Lobby, which resides on the Stormeave Plateau, is where every Breaker starts out before the match begins.
Here you can get familiar with your squad, and get some practice with the different Gauntlets and Runes.
Once a certain number of players have joined a lobby, the match countdown will start.
After match start, players will have 20 seconds to choose a portal to drop from into the Hollow Lands.
Players will drop together with their squad by default, and can move their squad's spawn portal by right clicking.
Game Modes
Spellbreak currently has 4 Game Modes: Battle Royale, Clash, Practice & Tutorial.


Tutorial
The first time the player launches the game they're introduced to Avira Emberdane, who during the tutorial shows them the ropes of being a Breaker.
The tutorial consists of 9 steps:
- 1. Introduction to Avira & Basic Movement.
- 2. Levitation
- 3. The Pyromancer Class and Spells & Sorceries.
- 4. Elemental Interactions
- 5. Runes
- 6. Talents & Scrolls
- 7. Equipment & Consumables
- 8. Reviving disrupted squadmates.
- 9. Portals
Practice
In the practice lobby you can freely try out all the Classes, Runes, Gauntlets and their many Elemental Interactions.
Experiment with different builds and hone your skills against target dummies.
Battle Royale
In this game mode, the player can queue as either ![]() Solo,
Solo, ![]() Duo or
Duo or ![]() Squad (3 players). Each game lobby can house a maximum of 42 players.
Squad (3 players). Each game lobby can house a maximum of 42 players.
To win the match, players must fight to exile eachother while staying out of the Spellstorm until they're the last ones standing.
In solo queue, the player will be exiled upon taking lethal damage, ending their match.
All equipment plus a random ![]() Scroll they have read will be dropped in the process.
Scroll they have read will be dropped in the process.
In duo & squad queues, upon lethal damage the player disrupts into a wisp instead.
disrupted players are immune to damage, but their actions are limited to slow movement alone.
While disrupted they may either be ![]() exiled by an opponent, or
exiled by an opponent, or ![]() revived by a squadmate, following a 5 second channel.
revived by a squadmate, following a 5 second channel.
Being revived restores them back to life with 40 health.
If they fail to be revived within 90 seconds, or if their remainding squad is disrupted as well, they will be exiled.
Clash
Clash is a team deathmatch-style game mode where two teams of up to 9 players are pitted against each other, in a race to reach the required score and win the game.
At match start the map is divided into two halves with an equal amount of portals for each team to choose from.
Additionally, the first safe zone starts out much smaller, but will not shrink as much compared to Battle Royale.
Each team is made up of up to 3 squads, with the required score being equal to 3 times the total player count at match start.
So for a full lobby of 18 players, the required score will be 54.
Each exile will add one point to the score of the exiling team.
Matches will end prematurely by "mercy ruling" if one team is ahead by 20 points.
Upon being exiled the player will drop all their equipment + a random read ![]() Scroll as per usual, but it despawns after 45 seconds.
Scroll as per usual, but it despawns after 45 seconds.
They will then respawn and drop from a random portal within the current safe zone wiith full health and armor, duplicate equipment and 2x ![]() Armor Shards in their inventory.
Armor Shards in their inventory.
However, one should expect to be exiled often as there are no ![]() consumbles to be found except through the
consumbles to be found except through the ![]() Finders Keepers Talent.
Finders Keepers Talent.
Finally, ![]() Mana Vaults spawn considerably more frequently.
Mana Vaults spawn considerably more frequently.
Matchmaking
A large update to matchamking was planned for Chapter 1, but it has since been postponed to the next Patch Update.
As a result, region-specific temporary measures were implemented:
All Regions
- As a general rule, players across ALL platforms will matchmake together.
- Players of all Mage Ranks will matchmake together in Clash. Higher ranked players will be distributed evenly between the teams when possible.
- Players of Mage Rank 23 or higher matchmake together in Battle Royale, separate from higher ranked players.
- Playstation and Xbox players of all Mage Ranks who have crossplay disabled, will matchmake together.
- The first few BR matches will contain a greater number of bots to ease the player in.
- All BR matches will eventually start even if there is only 1 player in the lobby. (The remainder will be filled with bots.)
- Clash matches are never filled with bots.
NA Only
- Players below Mage Rank 23 will matchmake together with their OWN platform.
- Crossplay between platforms at lower Mage Ranks is still possible by inviting a friend to join your squad.
The player in your squad with the highest platform "tier" will determine which platform you matchmake against.
(Platform tiers from highest to lowest: PC > PS4 / Xbox > Switch)
- Crossplay between platforms at lower Mage Ranks is still possible by inviting a friend to join your squad.
- NA-west & NA-east server regions may matchmake together.
Controls
Controller Support
The game supports a wide variety of controllers, with optional aim assist.
Xbox 360 & Xbox One controllers work right out of the box when plugged in.
Playstation Dual Shock 4 controllers require DS4Windows software.
PC Controls
Primary & Secondary Gauntlet hand can be swapped in the settings.
| PC Controls | |
|---|---|
| Action | Button |
| Move Forward | W |
| Move Back | S |
| Move Right | A |
| Move Left | D |
| Jump | Space Bar |
| Levitate | Space Bar (Hold) |
| Crouch | C |
| Toggle Auto Run | = |
| Emote | G |
| Emote Page Scroll | G (Hold) + Scroll Wheel |
| Cast Primary Spell | Left Mouse Button |
| Cast Primary Sorcery | Q |
| Aim Primary Spell Sorcery | Q (Hold) |
| Cast Secondary Spell | Right Mouse Button |
| Cast Secondary Sorcery | E |
| Aim Secondary Sorcery | E (Hold) |
| Use Rune | LShift |
| Pick up / Use | F |
| Swap Item | F (Hold) |
| Ping Place / Deny | Middle Mouse Button |
| Ping Danger / Confirm | Middle Mouse Button (Hold) |
| Open Map | M |
| Move Spawn Portal - Player | Left Mouse Button (On Portal) |
| Move Spawn Portal - Party | Right Mouse Button (On Portal) |
| Push to Talk | V |
| Show / Hide Minimal UI | Ctrl+Shift+X |
| Show / Hide UI | Ctrl+Shift+Z |
| Show / Hide Inventory & Skill Menu |
Tab |
| Active Hot Key | Z |
| Change Active Hot Key | Scroll Wheel |
| Use / Swap Item - Slot 1 | 1 |
| Use / Swap Item - Slot 2 | 2 |
| Use / Swap Item - Slot 3 | 3 |
| Use / Swap Item - Slot 4 | 4 |
| Drop Item - Slot 1 | Ctrl+1 |
| Drop Item - Slot 2 | Ctrl+2 |
| Drop Item - Slot 3 | Ctrl+3 |
| Drop Item - Slot 4 | Ctrl+4 |
| Main Menu (Exit / Back) | Escape |
| Main Menu (Confirm) | Enter |
| Spellbreak | Spellbreak |
|---|---|
| Gameplay • Game Modes • Spells & Sorceries • Equipment • Classes Cosmetics • Leagues • Progression • Talents • Class Strategies Chapters • Lore • Garrick's Journal • Status Effects • Build Library Concept Art • Founder Packs • Patch Notes • Archives |